Quantcast
Channel: jQuery By Example
Viewing all 248 articles
Browse latest View live

Take webpage screenshot using HTML5 and jQuery

$
0
0
In this post, you will find various solutions and ideas about how to take or capture webpage screenshot using HTML5 Canvas, jQuery and Javascript. This is quite useful feature as you can allow their end users to report about any errors, feedback or suggestion with webpage screenshot.

I had previously posted about other HTML5 related post like HTML 5 based text editor plugin, Top & Best 5 Free HTML 5 audio player and Upload files Gmail style using jQuery and HTML 5. In this post, you will find jQuery plugins and JavaScript techniques to take webpage screenshot.


1. Feedback.js

This script allows you to create feedback forms which include a screenshot, created on the clients browser, along with the form. The screenshot is based on the DOM and as such may not be 100% accurate to the real representation as it does not make an actual screenshot, but builds the screenshot based on the information available on the page.

The script is based on the html2canvas library, which renders the current page as a canvas image, by reading the DOM and the different styles applied to the elements. This script adds the options for the user to draw elements on top of that image, such as mark points of interest on the image along with the feedback they send.

It does not require any rendering from the server, as the whole image is created on the clients browser.

2. Html2Canvas

The script traverses through the DOM of the page it is loaded on. It gathers information on all the elements there, which it then uses to build a representation of the page. In other words, it does not actually take a screenshot of the page, but builds a representation of it based on the properties it reads from the DOM.

As a result, it is only able to render correctly properties that it understands, meaning there are many CSS properties which do not work.

3. Take Screenshot with HTML5 and JavaScript

This article explains how to take webpage screenshot using HTML5 and JavaScript code only. Yes you have read it correct its using HTML5 and JavaScript only. :). You can check the live demo here.

Feel free to contact me for any help related to jQuery, I will gladly help you.

jQuery - Page Redirect after X seconds wait

$
0
0
You must have come across any website which uses a webpage with some annoying advertisement and a message that says "You will be redirected to actual page after X seconds". This can be easily implemented with jQuery. In this post, find jQuery code to redirect user to another webpage after specific time interval or few seconds.

Related Post:
The below jQuery code uses JavaScript setInterval which executes a function, over and over again, at specified time intervals. So all is required is to set the setInterval as 1 second and then minus the counter from actual time interval. When it reach to zero second , simply redirect to specific path.
$(document).ready(function () {
   window.setInterval(function () {
      var iTimeRemaining = $("#spnSeconds").html();
      iTimeRemaining = eval(iTimeRemaining);
      if (iTimeRemaining == 0) {
         window.location.href = "http://jquerybyexample.blogspot.com/";
      }
      else {
         $("#spnSeconds").html(iTimeRemaining - 1);
      }
  }, 1000);
});
Feel free to contact me for any help related to jQuery, I will gladly help you.

jQuery stylish CSS3 image zoomer

$
0
0
Earlier I had posted about 5 Awesome jQuery Plugin to Create Zoom effects, How to Zoom image on mouseover using jQuery and Add magnifying glass to images using jQuery. In this quick post, I am sharing you a jQuery plugin which uses CSS3 to create stylish image zoomer.


SKDZoom - A jQuery stylish CSS3 image zoomer plugin with lens zoom support. Big image shows in a awesome rounded box beside the thumbnail. It is very light weight and easily customizable image zoomer.

Feel free to contact me for any help related to jQuery, I will gladly help you.
Writing your first jQuery Mobile app - Part 1

$
0
0
In this post, You will learn a guide to start with jQuery Mobile and making your first application using jQuery Mobile. This post mainly focus on basics of jQuery mobile and provide a path to start with jQuery Mobile.

Before we begin, its important to know "What is jQuery Mobile"? Well, jQuery mobile is a framework created for making platform independent mobile applications. It is built using HTML5, CSS3, and the very popular jQuery library.


Lets begin...

jQuery mobile uses HTML5 extensively so to get full advantage of jQuery mobile, we need to use HTML 5. So first, we will declare the HTML5 doctype.
<!DOCTYPE html>
Next thing to tell the browser about width of your page. This is important for mobile application as if not specified that it may appear awkward on mobile devices. In the head tag of page, a meta viewport tag sets the screen width to the pixel width of the device
<meta name="viewport" content="width=device-width, initial-scale=1">
Now lets load the jQuery mobile framework in head section. We shall use the CDN enabled links for better performance. Please take a note we need to reference jQuery mobile CSS, jQuery and jQuery mobile js file.
<link  rel="stylesheet" type="text/css"  href="http://code.jquery.com/mobile/1.3.1/jquery.mobile-1.3.1.min.css"/>

<script src="http://code.jquery.com/jquery-1.8.2.min.js"></script>

<script src="http://code.jquery.com/mobile/1.3.1/jquery.mobile-1.3.1.min.js"></script>
That's all for the head section of the page. Before we move to body of the page, it is important to understand the page structure of jQuery mobile app. As seen in below image, it has 3 sections "Header", "Content" and "Footer". The page, its header, footer, and content are all <div> containers, which are styled by using the HTML 5 data-role attributes.

In the body, we shall create different page blocks, where pages are nothing but <div> elements with HTML 5 data attributes.

Let's first create a single page. As mentioned earlier in the post, jQuery mobile uses HTML 5. So to define a page, it uses HTML5′s data attribute "data-role=page".
<div data-role="page">
</div>
Remember, we can have many such <div> elements with "data-role=page" attribute within single <body> tag. A body tag can hold multiple mobile pages too.
Now, we shall create header, content and footer section of the page. This is again achieved using HTML 5 data-role attributes.
<div data-role="header">
</div>
<div data-role="content">
</div>
<div data-role="footer">
</div>
Let's go ahead and put some content in all 3 sections.
<div data-role="header"><h1>Welcome!!!</h1>
</div>
  
<div data-role="content"><p>Welcome to my blog and you are reading how to write your first jQuery mobile app.</p>
</div>
  
<div data-role="footer"><h1>jQuery By Example</h1>
</div>
Putting is all together then this is how it looks.
<!DOCTYPE html>
<html>
<head> 
  <meta name="viewport" content="width=device-width, initial-scale=1"> 
  <title>My First jQuery Mobile Application</title> 

  <link rel="stylesheet" type="text/css"  href="http://code.jquery.com/mobile/1.3.1/jquery.mobile-1.3.1.min.css"/>
  <script src="http://code.jquery.com/jquery-1.8.2.min.js"></script>
  <script src="http://code.jquery.com/mobile/1.3.1/jquery.mobile-1.3.1.min.js"></script>
</head> 

<body> 
  <div data-role="page">

     <div data-role="header"><h1>Welcome!!!</h1></div>

     <div data-role="content">
        <p>Welcome to my blog and you are reading how to write your first jQuery mobile app.</p>
     </div>

     <div data-role="footer"><h1>jQuery By Example</h1></div>

  </div>
</body>
</html>
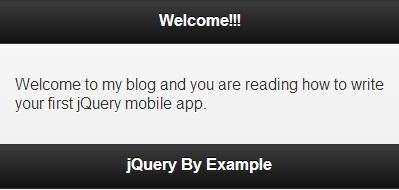
So, now when you view this page in mobile it will look like this..


Congratulations, You have just done with your first jQuery Mobile application.
When I started with my first app, the one thing got my attention instantly. Question came to mind about the styles applied to the page, the colors used for header, footer and content containers. As while creating the app, I have not specified any styles. Well, welcome to jQuery mobile themes.

The framework provides 5 default basic color schemes called "color swatches". They are named a, b, c, d and e. And by default, swatch a is used when you create a page. This provides combination of white and black colors, as seen in the previous screenshot.
Now, you must be thinking how should I change the theme? Well you can change the color swatch of your page and header/footer by using the data-theme attribute.
<div data-role="header" data-theme='b'></div>
You can also define different themes for different containers.
<div data-role="header" data-theme='b'> 
</div>
<div data-role="content" data-theme='c'>
</div>
<div data-role="footer" data-theme='b'>
</div>
Let's change the theme to our demo and see how it looks.

Along with these 5 predefined themes, jQuery mobile also allows you to create custom theme using ThemeRoller.

Now, lets modify the demo and add a button in header section. For now, on click of this button we will redirect user to Home.html. Although the page doesn't exists but for demo its fine.

Defining a button is quite simple. Buttons are coded with standard HTML anchor and input elements, then enhanced by jQuery Mobile to make them more attractive and useable on a mobile device. Use anchor links (a elements) to mark up navigation buttons, and input or button elements for form submission. Lets define a navigation button in header section.
<div data-role="header">
   <a href="Home.html">Home</a>
   <h1>Welcome!!!</h1>
</div>
You can also define icons for the button using predefined icon set
provided by jQuery Mobile. To define an icon, use "data-icon" attribute.
<a href="Home.html" data-icon="home">Home</a>
Summary

I hope you find this post useful and good enough to start with jQuery mobile. By now, you must have an idea about creating single page, changing themes and defining buttons. In next post, I will show more about creating multiple pages and navigation between pages.

Feel free to contact me for any help related to jQuery, I will gladly help you.

Create Multiple jQuery Mobile Pages and Link them - Part 2

$
0
0
In my previous post about Writing your first jQuery Mobile app - Part 1, I have explained about creating single page, changing themes and creating navigation button. And in this post, we will see more about pages, creating single page template and multiple page template.

What are "Pages"?

A Page in jQuery Mobile is nothing but a container created within a <div data-role="page"> that is displayed on the screen. It can contain the header, the page content, and the footer. The jQuery Mobile application can have individual HTML files each representing a single page, or it can have single HTML file containing multiple pages div containers within it. You can place widgets and embed controls within page.

Single Page Template

Single-page template means create individual pages for every HTML file. Where every HTML file will have its own page container created using <div data-role="page">. So we shall create two individual HTML file named "index.html" and "Next.html" and link them using navigation buttons.

So below is the body of "index.html". For the head sections and referencing jQuery mobile read Part 1.
<div data-role="page">
    <div data-role="header" data-theme='b'>
      <h1>My Website</h1>
    </div>
    <div data-role="content" data-theme='c'>
      <p>This is index.html.</p>
      <a href="next.html" data-role="button">Go to Next.html</a>
    </div>
    <div data-role="footer" data-theme='b'>
      <h1>Footer</h1>
    </div>
</div>
The button to move to "Next.html" page is placed in content section and applied "data-role=button" to let jQuery mobile know that this is a button element so that jQuery mobile can take necessary action for automatically enhancing and displaying. And this is how it should look.


Now, create "Next.html" and below is the body of "Next.html".
<div data-role="page">
    <div data-role="header" data-theme='b'>
      <a href="index.html" data-icon="home">Home</a>
      <h1>My Website</h1>
    </div>
    <div data-role="content" data-theme='c'>
      <p>This is Next.html. Click Home button to go to index.html</p>
    </div>
    <div data-role="footer" data-theme='b'>
      <h1>Website Footer</h1>
    </div>
</div>
In this page, the button to move to "Index.html" is placed in header section and applied "data-icon=home" to display home icon. And this is how it should look.


Now when you run this app, index.html page is first loaded into the DOM. When you click on the button to open Next.html, the index.html page is hidden from view, and Next.html is displayed.

This approach has following advantages.
  • Your pages are clean, small and easy to maintain.
  • Your DOM size is also small.
It also has disadvantage.
  • It consumes more bandwidth as each page visit generates a new request.
Remember, in single page approach declaring the <div data-role="page"> page container is optional.

Multi-Page Template

In a multi-page template, the single HTML file will have multiple pages in it which means multiple <div data-role="page">. To differentiate these pages, assign an Page ID to every div element. The page ID must be unique within your app. Later on, using Page ID we can link them together and navigate through them.

So, lets create a single HTML file named "index.html" and create multiple page within it.
<div id="page1" data-role="page">
    <div data-role="header" data-theme='b'>
      <h1>My Website</h1>
    </div>
    <div data-role="content" data-theme='c'>
      <p>This is Page 1.</p>
      <a href="#page2" data-role="button">Go to Page 2</a>
    </div>
    <div data-role="footer" data-theme='b'>
      <h1>Footer</h1>
    </div>
</div>

<div id="page2" data-role="page">
    <div data-role="header" data-theme='b'>
      <h1>My Website</h1>
    </div>
    <div data-role="content" data-theme='c'>
      <p>This is Page 2.</p>
      <a href="#page1" data-role="button">Go to Page 1</a>
    </div>
    <div data-role="footer" data-theme='b'>
      <h1>Footer</h1>
    </div>
</div>
Now when you run this app, the index.html file will be loaded with all the pages and you can navigate through them via navigation buttons. This is same as like creating multiple anchor tags links within a simple HTML page.

This approach has following advantages.
  • All your pages are loaded in one go so your mobile application works faster and consume less bandwidth.
  • Your DOM size is also small.
It also has following disadvantage.
  • This is only useful when you have small number of static pages and with minimum content.
  • The DOM size is relatively large compare to single page approach.

Setting Title of Pages

With Single Page Template approach, you can easily set the title of every page because each page is separate file, but in case of Multi-Page Template, how will you set different titles for every page?

Answer is: You can use the <title> tag to set the title for the first or the main page of the multi-page template app and other pages define "data-title" attribute to set the title for particular page.
<div id="page2" data-role="page" data-title="Page 2">

More about Linking Pages

jQuery Mobile is designed to work with simple page linking conventions. We link pages as we normally would, and jQuery Mobile will automatically handle page requests. In a single-page template, it uses Ajax when possible. When Ajax isn't possible, a normal http request is used instead. That's a default behavior. However, you can disabled the ajax navigation using "data-ajax=false" attribute.
<a href="Next.html" data-role="button" data-ajax="false">Go to Next Page</a>
There are situations where Ajax transitions are not used when a request page is:
  • from an external domain
  • data-ajax="false" attribute is used
  • rel="external" is specified
  • target attribute is specified

In case of Multi-Page Template approach, Ajax navigation is by default and disabling it doesn't make any difference. The only change you will find when you disable Ajax navigation is, the default slide transition will be used to load the pages regardless of what transition you have specified in the data-transition attribute.
<a href="Next.html" data-role="button" data-ajax="false" data-transition="flip" >Go to Next Page</a>
In above code, though data-transition is set to "flip" but since Ajax navigation is turned off, it will be displayed using slide transition.

Using data-rel="back" attribute

Using data-rel="back" attribute, you can create back button behavior (as we usually do with JavaScript). It uses browser history to navigate to previous page. When both the href and data-rel="back" attributes are specified for an anchor link, then href attribute is ignored by the framework and the data-rel attribute will be considered.

Summary

In this post, you got an idea about creating Single Page Template application, Multi-Page Template application and then linking the pages within the application. Also got answers for defining titles of the pages, turning off ajax navigation and creating back button in jQuery Mobile App. In next post, I will show more about Prefetching and Caching Pages.

Feel free to contact me for any help related to jQuery, I will gladly help you.

jQuery Mobile: Prefetching and Caching Pages - Part 3

$
0
0
This is my third post of jQuery Mobile Series and In first two Post, I had explained about Writing your first jQuery Mobile app - Part 1 and Create Multiple jQuery Mobile Pages and Link them - Part 2. And in this post, you will see how to prefetch and cache pages in case of single page template application. To know more about Single Page Template and Multi-Page Template, read Part 2.

Just to recollect you about Single Page Template that there should be individual HTML file for each page and in Multi Page Template, all the pages are combined into single HTML file. As mentioned in Part 2 article, that with Multi Page Template approach all the pages are loaded in one go so your mobile application works faster and consume less bandwidth.

With Single Page Template application, every page is fetched during navigation and you will see a loading spinner animation. But using the prefetch feature, a single-page template application can be made to behave like the multi-page template application.

Related Post:
When using single-page templates, we can prefetch pages into the DOM so that they're available instantly when the user visits them. To prefetch a page, add the data-prefetch attribute to a link that points to the page. jQuery Mobile then loads the target page in the background after the primary page has loaded and the pagecreate event has triggered. For example:
<a href="prefetchThisPage.html" data-prefetch>Page 2</a>
We can define this attribute for as many as we would like to prefetch. You can also load the page programatically using $.mobile.loadPage() method.
$("#page1").bind("pageshow", function(event, data) {
  $.mobile.loadPage( "prefetchThisPage.html", { showLoadMsg: false } );
});
How it works?

Prefetching of pages occurs in background and they creates additional HTTP requests and use bandwidth to load the pages. So when you visit the prefecthed page, you won't see the loader/spinner icon as page is already loaded.

But what if you make a request for the prefetched page but prefetch is not complete? In such case, you will see loader/spinner comes up and the page is shown once it is completely fetched.

Common scenario for using this feature is a photo gallery, where you can prefetch the "previous" and "next" photo pages so that the user can move quickly between photos. It is a great feature, but you have to careful here.
  • As if there are more pages, more http requests and more bandwidth is consumed to prefetch.
  • You should implement this feature only when you are sure that user will visit the prefetched page.

Remember "Prefetching doesn't mean Caching". When a page is prefetched, it is available in the DOM. If you navigate to this prefetched page and then navigate to another page, the prefetched page is automatically removed from the DOM. So its not caching.

Caching pages

In single-page template application, each new page is fetched and stored in the DOM. The page remains in the DOM and is removed once you move away from the page. Only the main or the first page of the app always remains in the DOM. Prefetching helps but to some extent only. So the answer is "Caching".

With DOM caching, you can cachne specific pages in the DOM. These pages, once loaded, remain in the DOM through the life cycle of the app. There are 2 ways to cache the pages either via adding "data-dom-cache" attribute or via JavaScript.
<div data-role="page" id="cacheMe" data-dom-cache="true">
<div>
Or Via JavaScript
<div data-role="page" id="cacheMe">
  <script>
    $("#cacheMe").page({ domCache: true });
  </script>
<div>
There is also another way to cache all pages globally, instead of caching specific pages. Put below jQuery code to the <head> section of your main page. Now, every page visited automatically gets cached in the DOM.
<script>$.mobile.page.prototype.options.domCache = true;</script>
The drawback of DOM caching is that the DOM can get very large, resulting in slowdowns and memory issues on some devices. So use caching carefully.

Remember:
When Ajax navigation is used, then remember only <head> section is processed of first page or the main page of your app. The <head> element of other pages is ignored and only their page's div containers are processed. Thus, to make sure that your javascript code is executed in these pages, you need to include the <script> tag within the page's div container.
Summary

In this post, you got an idea about prefecthing and caching pages in Single Page Template application, advantage of prefetching and caching pages. In next post, I will show more about about creating Dialogs in jQuery Mobile App.

Feel free to contact me for any help related to jQuery, I will gladly help you.

Creating Dialog Box in jQuery Mobile - Part 4

$
0
0
This is my 4th post of jQuery Mobile Series and In first three Post, I had explained about Writing your first jQuery Mobile app, Create Multiple jQuery Mobile Pages and Link them and Prefetching and Caching jQuery Mobile Pages. And in this post, you will see how to create dialog box in jQuery mobile.

Let's begin

Any page in jQuery mobile can be created as dialog box. All you need to do is to apply data-rel="dialog" attribute to the to the page anchor link and jQuery mobile will do the rest. Remember the dialog should be a separate page div which you can load or include in your HTML.
<a href="dialog.html" data-rel="dialog">Open Dialog</a>
When the "dialog" attribute is applied, the framework adds styles to add rounded corners, margins around the page and a dark background to make the "dialog" appear to be suspended above the page.

You can also create dialog with Multi-Page application. To know more about Single Page Template and Multi-Page Template, read Part 2.
<a href="#dialog" data-rel="dialog">Open Dialog</a>
In the demo, you should have noticed that dialog box has close button to close it. jQuery mobile framework works quite well here. If the dialog has a header the framework will also add a close button at the left side of the header. If no header, then no close button.
By default, the dialog will open with "popup" transition. But you can always change the transition using data-transition="pop" attribute.
<a href="dialog.html" 
   data-transition="flip" 
   data-rel="dialog">Open Dialog</a>
You can chose any transition method from "flip", "fade", "pop", "turn", "flow", "slide", "slidefade", "slideup" and "slidedown". To make it feel more dialog-like, jQuery Mobile recommends specifying a transition of "pop", "slidedown" or "flip".
When any link is clicked within the dialog then dialog gets closed automatically. But what if when there are no links in the dialog box? In that case, you can add a button in dialog with data-rel="back" attribute to close the dialog box and return to previous page.
Dialogs have a default width of 92.5% and a max-width of 500 pixels. There is also a 10% top margin to give dialogs larger top margin on larger screens. You can change this default behavior by modifying .ui-dialog-contain css class.

Feel free to contact me for any help related to jQuery, I will gladly help you.

How to enable source maps in firefox?

$
0
0
With jQuery 1.9 release, Source Map support was introduced with jQuery as well. Its pretty useful and handy feature in terms of debugging on production servers. I have already posted about All you need to know about jQuery Source Maps. When jQuery 1.9 released, then source map feature was supported by Chrome only. And Finally latest version of Firefox 23.0.1, also supports this feature.

If you are still using deprecated/old features and want to switch to jQuery 1.9, Read How to migrate older jQuery code to jQuery 1.9+

How to enable it?

To enable it, right click in Firefox browser window and select Inspect Element(Q) or Go to Tools Menu -> Web Developer -> Select Debugger.


Once you click Inspect Element(Q), you will find a window appear in Firefox, which has all the controls and features to inspect your page. It is similar to Firebug but Firebug is an addon where this is inbuilt. Now in the window, there is a button named "Debugger" click on it.

When debugger is clicked, you can see list of js files referred in your code and also the code of your file. As you can see from below image, the code is referring to jquery.min.js from CDN, and same file name appear on the right side. (See Highlighted part)

Now, to enable Source Maps, Click on Setting (Gear like Icon) icon, as shown in image. A Menu will appear and from this menu, click on "Show original sources".

Once you click on "Show original sources", debugger will reload the code and this time you will find the jquery.js appear in right side window, instead of jquery.min.js. Where the code is still referring to minified version of the library.


So now when you debug your code and click Step in, the debugger tool will take you to jquery.js.

Source Map is indeed a very useful feature as it allows to debug minified version against a un-minified version. And it can help you to investigate production issues.

Feel free to contact me for any help related to jQuery, I will gladly help you.

jQuery x.x.x.min.map not found error

$
0
0
Source Map is a pretty useful and handy feature in terms of debugging on production servers. And if you are using jQuery 1.9+ Version then you may encounter the 404 not found error "jQuery x.x.x.min.map not found". For example, if you are using jQuery 2.0.2 version then you may get "jquery-2.0.2.min.map" not found error . And this is also applicable for jQuery mobile version as well.


When jQuery 1.9 released, then the source map feature was supported by Chrome only. And now the latest version of Firefox 23.0.1, also supports this feature. Find out how to enable source maps in firefox?

Related Post:
You will get this error in Chrome and Firefox only when you have enabled "Source Map" features in browser. Read about how to enable this feature in Chrome and Firefox.

From Official jQuery website,
Starting with jQuery 1.9, jQuery team also make available sourcemap files that can be used to debug the compressed file in sourcemap-aware browsers such as Google Chrome and Firefox. The map file is not required for users to run jQuery, it just improves the developer's debugger experience.
So when you download jQuery library then you should also download the source map file. For example, if you have downloaded jquery-2.0.3, then you should also download called jquery-2.0.3.min.map.

The only way to fix this error is to place source map file at same location where is your jquery library is. For example, location of jquery-2.0.3.min.map must be where is your jquery-2.0.3.min.js file is.

Feel free to contact me for any help related to jQuery, I will gladly help you.

Awesome jQuery Mobile Plugins

$
0
0
In era of smartphones, mobile website/application has become demand of every industry. With this growing demand of mobile apps, the jQuery Mobile library has also become very popular and first choice for creating mobile apps.

Earlier I had posted about Writing your first jQuery Mobile app - Part 1 and series of articles on jQuery Mobile and about 5 jQuery Image Viewer Plugin for Mobile. In this post, find the most widely used and amazing jQuery mobile plug-ins for developing mobile based applications and websites.

Mobiscroll - [Paid]


Mobiscroll is a complete product with lots of controls/plugins for your mobile app like Calendar, color picker, range picker, rating plugin and many more. The controls are cross platform, Themable and have multi framework support. They provide 30 days trial period for satisfaction.


Mobi Pick


Mobi Pick is an Android-style datepicker widget for jQuery Mobile. It uses the date library XDate and allows progressive enhancement for date input fields using Modernizr.


Google maps jQuery Mobile plugin


The Google Map version 3 plugin for jQuery and jQM takes away some of the head aches from working with the Google Map API. Instead of having to use Google event listeners for simple events like click, you can use jQuery click events on the map and markers. It is also very flexible, highly customizable, lightweight (3.2kB or 3.9kB for the full) and works out of the box with jQuery mobile.


PhotoSwipe


PhotoSwipe is a FREE HTML/CSS/JavaScript based image gallery specifically targeting mobile devices.Developers and designers requiring an interactive image gallery on their mobile website with the look and feel of a native app. PhotoSwipe provides your visitors with a familiar and intuitive interface allowing them to interact with images on your mobile website.


Pagination


Pagination is a jQuery Mobile plugin for sequential pagination between pages with support for touch, mouse, and keyboard! The Pagination plugin creates touch-drag navigation between separate HTML pages.


Camera Slideshow


Camera slideshow is an open source project and it can be used for slideshows and as a content slider. Camera slideshow is tested on new browsers and it works on mobile devices as well.


DateBox


DateBox is a jQueryMobile plugin that aims to make user interaction with dates and times simple and intuitive. It is a colloborative work, with a full range of features allowing easy implementation, and painless extensibility. This plugin allows date selection, time selection and duration selection. And the selection widget can appear like Flip box, Slide box.


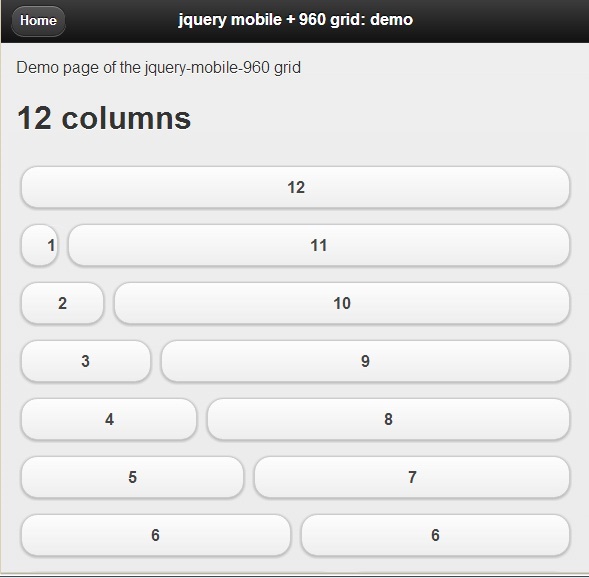
960 Grid on jQuery-Mobile


jQuery-mobile-960 is a port of 960 grid to jQuery mobile. It merge the flexibility of 960.gs, and the ease of jQuery mobile. It aims to bring more flexibility to jQuery mobile layout and thus make it easier to use on tablets.


bxSlider


bxSlider is fully responsive, with touch / swipe support plugin to show slides can contain images, video, or HTML content. It uses CSS transitions for slide animation (native hardware acceleration!)


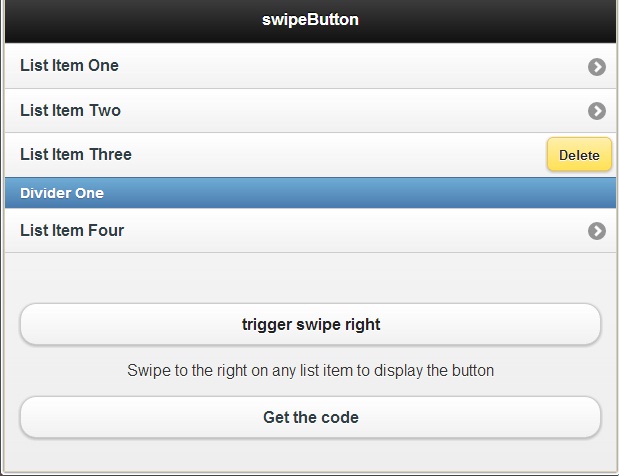
SwipeButton


SwipeButton is a jQuery Mobile plugin which allows developers to add iPhone style buttons to listview rows by attaching to the swipe event.


SplitView


This is a plugin for jQuery Mobile that detects your device's browser width and renders pages accordingly - e.g. splitview for desktop and tablets, and standard jqm for mobile phones.


Feel free to contact me for any help related to jQuery, I will gladly help you.

Newest jQuery plugins worth looking at

$
0
0
Many jQuery plugins are released daily and in today's busy life it is difficult to follow various new plugin releases. So in this post, find a complied list of some of the latest and newest jQuery plugins which are worth to look as they offer new functionality with great design and ease.

Also take a look at my earlier post about latest plugin released in May 2013, June 2013 and July 2013.

jGallery


jGallery is free jQuery photo gallery with albums and preloader, comes with 41 configuration parameters and 43 transition effects. It uses modern technology and compatible with all major browsers.


jQuery Fullscreen Editor


jQuery Fullscreen Editor is a lightweight jQuery plugin that adds fullscreen mode to text fields. It transforms textfields to customizable editors, either it can be used within a form or standalone.


Super Simple Text Rotator


Super Simple Text Rotator is a light weight jQuery plugin that will allow you to add a super simple rotating text to your website with little to no markup.


FreeWall


Freewall is a responsive and cross-browser jQuery plugin for creating dynamic grid layouts for desktop, mobile and tablet.Freewall allows you to create many types of grid layout (flexible layout, grid layout, images layout, pinterest-like layout, etc) with nice CSS3 animation effects and call back events.


One Page Scroll


One Page Scroll plugin create an Apple-like one page scroller website (iPhone 5S website) with One Page Scroll plugin.


Wheel Menu


Wheel Menu is a small jQuery plugin that will add a fully customisable Path-like wheel menu button to your website


Ion.Sound


Today websites are full of events (new mail, new chat-message, content update etc.). Often it is not enough to indicate this events only visually to get user attention. You need sounds! Ion.Sound — Plugin for playing sounds on event. Cross browser support for Google Chrome, Mozilla Firefox, Opera, Safari, IE(9.0+) and mobile browsers.


ContentShare


ContentShare is a jQuery plugin which lets you share the exact content on a page which you actually want to share. It enables you to share selected text on your social network rather the default text specified in the meta tags. By default, it supports Facebook and Twitter but you can add more networks easily.


Loadie


Loadie.js is a lightweight jQuery plugin to create a preloader that doesn't suck.


CLNDR


CLNDR is a jQuery plugin for creating calendars. Unlike most calendar plugins, this one doesn't generate markup. Instead you provide an Underscore.js HTML template and in return CLNDR gives you a wealth of data to use within it.


Feel free to contact me for any help related to jQuery, I will gladly help you.

jQuery code not working - A Daily Battle

$
0
0
Developers life is full of various code battles and "jQuery is not working" or "jQuery code is not working" is a just another daily battle which they have to fight against while working with jQuery. The message "jQuery is not working" itself defines its pain saying "Oh!!! there is something buggy in your code and that is stopping me from working". So in this post, we will see some basic strategies to win this "Daily Battle".


Earlier I had posted about Common jQuery Mistakes, Various reasons and solutions of jQuery is not defined error and series of articles on jQuery Mobile which you may find helpful to read.. Okay, Lets begin...

STRATEGY No. 1 : Check for jQuery Reference

The first strategy is to ensure that you have included the reference of jQuery library and That too at correct place. It has to before your jQuery code.
<script type="text/javascript" language="javascript">
  $(document).ready(function() {
      //Your jQuery code goes here....
 });
</script>

<script type="text/javascript" src="Script/jquery-1.9.2.min.js"></script>
So with this code, you are ready for your "Daily Battle", as the reference of the jQuery library is after the code.

Another important thing which matters a lot is order of your scripts. For example, if you are using jQuery along with jQuery UI, first include jQuery and then jQuery UI library.
<script type="text/javascript" src="Script/jquery-1.9.2.min.js"></script>
<script type="text/javascript" src="Script/jquery-ui-1.8.18.min.js"></script>
Same is true while using jQuery plugins.

STRATEGY No. 2 : Check Your Selectors

The second strategy is to find out whether "Wrong Element ID or CSS Class Name" is not used. This is a very common mistake developers do while writing code. This happens because developers believe that they can never go run with this. As they say "Confidence is good but over-confidence is bad".

Another common cause is to mix up "#" (hash) and "." (dot). Remember, "#" is used to select elements by ID and "." is used to select elements by css class name. Many times developer mixes these two and get ready for "Daily Battle". So make sure that your selectors are correct.

STRATEGY No. 3 : Check for Comma, Semi-colon, Brackets and Syntax

When you write jQuery code, you will find comma, quotes, semi-colon and brackets everywhere. Without the proper/correct use of these characters, your jQuery code is not going to love you back. So make sure that all these character are in place.

Another common mistake which every developer does, not intentionally though is incorrect syntax. Sometimes due to hurry or time limit, developers may ignore to check syntax which may lead to "Daily Battle". So make sure your syntax is correct.

STRATEGY No. 4 : Check for jQuery Version

jQuery team is continuously updating this library for making things fast and include new things. And they come up with newer version. Due to excitement of new release and eagerness to use new functionality, developers sometime include the new jQuery version without checking for old code compatibility.

For example, $.browser property to check for browser was removed in jQuery 1.9. And if you are using $.browser in your code and you have updated your code to jQuery 1.9, then your old code is going to break. Your Lead/ Project Manger/ Client will give you a kick and you are ready for your "Daily Battle".

So before updating to newer/latest version, check the release log on jQuery website to find out if any functionality is removed or deprecated in newer release. And always remember to test your old code against the new release.

STRATEGY No. 5 : Check for Conflict

Conflict happens. It happens everywhere. Well, lets admit it that "Nobody likes Conflict" and same is true for jQuery. It also hates conflicts. But conflicts with whom? Well, remember jQuery is not the ONLY client side library which exists in this world. There are many other competitors like prototype, mootools, YUI etc. And when there is competition, there is conflict of interest.

These libraries also use $() as their global function and to define variables. This situation creates conflict as $() is used by jQuery and other libraries as their global function. And you are ready for your "Daily Battle".

So we need conflict resolution. And to resolve conflict, jQuery has jQuery.noConflict().
<script src="prototype.js"></script>
<script src="jquery.js"></script>
<script>
     jQuery.noConflict();
     // Use jQuery via jQuery(...)
     jQuery(document).ready(function(){
       jQuery("div").hide();
     });  
     // Use Prototype with $(...), etc.
     $('someid').hide();
</script>

The above mentioned strategies are nothing, but just a checklist which you can always follow when your "jQuery code is not working". If you have anything to add in this, please include them in comments and share with the world.

Feel free to contact me for any help related to jQuery, I will gladly help you.

jQuery - Correct way to check if object is null or Empty

$
0
0
Yesterday, I ran into a interesting and frustrating situation where for couple of minutes I was not able to find out what's wrong with my code. But I learned something new. Let me first give you an idea about what I was working on. I was creating a function, which first checks of div element object. If not found, then create a new div element and insert in DOM otherwise just update the html of div.

Related Post:

Below is the jQuery code.
$(document).ready(function () {
    function UpdateHTML() 
    {
        var $dvElement = $('#dvElement');
        if (!$dvElement) 
        {
            $("<div />", {
                id: 'dvElement',
                html: 'Added Just now'
            }).appendTo('body');
        } 
        else 
            $dvElement.html('Updated HTML');
    }
});
When this function is called, it does nothing. In the first call, it should create a div but it was not. When I debugged, I found that it is always going in else part of the condition. The condition (!$dvElement) always returning false. Wooo..Confused...
Every time when we pass a selector to jQuery function, it will always return a jQuery object. So whether the div exist or not, an object is returned. And when we test the jQuery object inside if statement, it will always be TRUE.

To fix the above code, we need to find out whether the object is empty. And there are 2 ways to fix this.
  • length property: Returns number of elements in object
  • $.isEmptyObject(Object): Returns true if the object doesn’t define any methods or properties.
So fix is,
$(document).ready(function () {
    function UpdateHTML() 
    {
        var $dvElement = $('#dvElement');
        if (!$dvElement.length)  // OR !$.isEmptyObject($dvElement)
        {
            $("<div />", {
                id: 'dvElement',
                html: 'Added Just now'
            }).appendTo('body');
        } 
        else 
            $dvElement.html('Updated HTML');
    }
});
So always use .length or $.isEmptyObject() function to find out whether object is empty, null or has some elements.

Feel free to contact me for any help related to jQuery, I will gladly help you.

10+ Best and Free jQuery Mobile Themes

$
0
0
jQuery mobile is an awesome and mostly used framework for mobile application. So in this post, we have complied list of the 10+ Best and Free jQuery Mobile Themes for your mobile application. These themes covers design style from iOS, Android, BlackBerry, Metro Style for Window phones, Bootstrap, Flat UI, Square UI and Android Holo.

Earlier I had posted about Writing your first jQuery Mobile app - Part 1 and series of articles on jQuery Mobile, collection of Awesome jQuery Mobile Plugins and about 5 jQuery Image Viewer Plugin for Mobile.

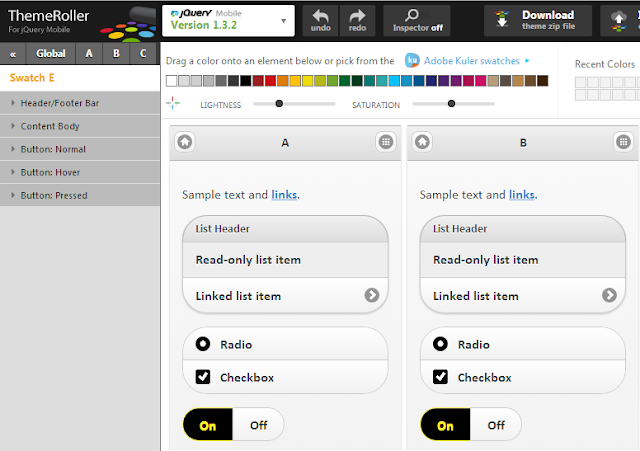
jQuery Mobile ThemeRoller


The ThemeRoller Mobile tool makes it easy to create custom-designed themes for your mobile site or app. Just pick colors, then share your theme URL, or download the theme and drop it into your site.


Graphite


A beautiful and minimalist theme pack and generator for jQuery Mobile 1.3.1.


Native Droid


nativeDroid is a theme for jQuery Mobile inspired by the native HOLO-Style on Android Devices. It comes with 5 different colors combined with dark/light theme.


Flat UI Theme


Theme for jQuery Mobile based on Flat-UI.


iOS theme


This is an iOS inspired jQuery Mobile theme.


Android Holo-inspired theme


The theme isn't an exact copy of Holo, but is inspired by it in terms of color scheme, fonts, and the corners for example. To make sure the theme can easily be ported to newer versions of jQuery Mobile, only the color's and font were changed. The font is, obviously, Roboto, and to be more precise, Roboto Regular and Roboto Thin.


BlackBerry theme


This is Blackberry inspired jQuery Mobile theme.


Square-UI Theme


Theme for jQuery Mobile based on Square-UI.


Bootstrap jQuery Mobile Theme


A jQuery Mobile theme based on Bootstrap.


Metro style jQuery Mobile Theme


This theme provides a Metro user interface for Cordova apps using jQuery Mobile on Windows Phone 7.5.


Mobjectify


Use Mobjectify to generate quick mockups for your mobile design which you can save online for easy testing on any device with a browser.


Feel free to contact me for any help related to jQuery, I will gladly help you.
Write Mobile Device specific code using jQuery

$
0
0
Believe me, a mobile application developer life is not easy. The war of different mobile platforms, different operating systems, different screen size for mobile and tablets and frequent releases of new devices are biggest challenge that they are facing. And their mobile application will be dying in ICU, if not treated and handled against the continuously improved, innovated and released new vaccines.


To make their life easy in this post, we are going to see how to write conditional CSS/JavaScript code based on mobile device operating system using a jQuery plugin. Earlier I had posted about 10+ Best and Free jQuery Mobile Themes, Awesome jQuery Mobile Plugins, Detect Mobile Browsers using jQuery and Detect Android Devices/Phone using jQuery.

There is a jQuery plugin called Device.js which makes it easy to write conditional CSS and/or JavaScript based on device operating system (iOS, Android, Blackberry, Windows, Firefox OS), orientation (Portrait vs. Landscape), and type (Tablet vs. Mobile) of device.

This plugin based on the device operating system, automatically updates the <html> section with appropriate css classes. See below image.

For iPhone


For Android Tablet


Current following devices are supported,
  • iOS: iPhone, iPod, iPad
  • Android: Phones & Tablets
  • Blackberry: Phones & Tablets
  • Windows: Phones & Tablets
  • Firefox OS: Phones & Tablets

All you need to do is to just include the script. And that's it.
<script src="device.js"></script>
Live Demo
This plugin provides different set of CSS Classes as well as JavaScript function for every mobile operating system. To find out all available Javascript methods and more about CSS classes list you can visit its home page on github..
Official Website
Feel free to contact me for any help related to jQuery, I will gladly help you.

Fixed for ASP.NET Checkbox -jQuery click event getting fired twice issue

$
0
0
This is really interesting. If ASP.NET checkboxes or checkbox list is placed within any container element like div or span, and click event is attached on checkbox. And then clicking on checkbox text will call click event twice. For example, consider the following HTML/ASP.NET code.
<div id="dvList">
  <asp:CheckBox ID="chk1" runat="server" Text="Check 1" CssClass="Dummy" /> 
  <asp:CheckBox ID="chk2" runat="server" Text="Check 2" CssClass="Dummy" /> 
</div>
Now using jQuery, bind click event to all the checkboxes which are child element of div element with ID "dvList".
$(document).ready(function(){
   $('#dvList').find('.Dummy').on('click',function(){
      alert('Test');
   });
});
If checkbox is clicked, then alert will come only once. But if click is made on text associate with checkbox, then alert will be displayed twice. Surprise!!! This is happening due to event bubbling. Before moving to event bubbling it is important to understand how checkbox is rendered in browser. A single ASP.NET checkbox,
<asp:CheckBox ID="chk1" runat="server" Text="Check 1" CssClass="Dummy" /> 
is rendered in browser like,
<span class="Dummy">
   <input id="chk1" type="checkbox" name="chk1" />
   <label for="chk1">Check 1 </label>
</span>
In above jQuery code, though we have setup click event handler for elements with class "Dummy" only but all the child elements also get wired to click event. We have set up a click event handler for both the <label> and the <input> and <span class="Dummy"> elements. So clicking on the <label>, the click event handler that on the label will execute, and then the click event handler set up on the <input> will execute as the label raises the click event on the <input> as well. This is exactly what event bubbling is.

To stop event bubbling, jQuery provides a method "stopPropagation()". See below jQuery code.
$(document).ready(function () {
   $('#dvList').find('.Dummy').on('click', function (evt) {
     alert('Test');
     evt.stopPropagation();
     evt.preventDefault();
  });
});
With this code, you will see alert appearing only once when you click on text but you will find that checkbox status is not getting updated. Which is due to
So, now what is the solution. Well, the solution is to first identify the element which was clicked. Whether its <label> or <span>. If its <label> or <span> then the click event will be fired twice. As explained earlier, click event first gets fired for the <label> or <span> and second time for <input>. So for the first trigger, we should simply ignore the click event by checking event target. And for next trigger, the source will be <input> so alert is fired.
$(document).ready(function(){
   $('#dvList').find('.Dummy').on('click',function(evt){
      var target = evt.target.tagName.toUpperCase();
      if (target === "LABEL" || target === "SPAN") { 
         return;
      }
      alert('Test');
   });
});
Feel free to contact me for any help related to jQuery, I will gladly help you.
jQuery, ASP.NET Client ID and External JS File

$
0
0
To find any ASP.NET Control in jQuery, we use Client ID property to get the correct ID of the rendered control. For example, to find an ASP.NET textbox with ID "txtName", a familiar jQuery syntax is,
$('<%= txtName.ClientID %>').focus( //Blah  Blah);
If you are writing this above code directly in your .aspx page, then your jQuery code will work but if you move the same code to an external or separate js (Java Script) file, you will get an error "Uncaught Error: Syntax error, unrecognized expression".

Related Post:

Any idea why this works on .aspx page?

Well the reason is, when the jQuery code is placed in .aspx page the jQuery code line such as <%=txtName.ClientID%>, is processed on the server and it is replaced with a proper ID generated by ASP.NET for the control. And when it is placed into a seperate JS file, ASP.NET has no role to play. Since the js file is not processed by ASP.NET and Client ID is not replaced, jQuery will throw the error "Uncaught Error: Syntax error, unrecognized expression" for characters < and > .

So how to fix this?

To fix this error, all you need to do is to remove < and > characters from your jQuery code. Which means you need to change your selectors and there are couples of ways to do this. For example the jQuery code,
$('<%= txtName.ClientID %>').focus( //Blah  Blah);
can be replaced with,
$("input[id*='txtName']").focus( //Blah  Blah);
The above code will select input controls which have "txtName" anywhere within the element's ID attribute value. You can also select the elements via class selectors.

If you are using ASP.NET 4.0, then you can take advantage of ClientIDMode property which when set to Static will keep the same ID in rendered page. For example:
<asp:TextBox ID="txtName" runat="server" ClientIDMode="static" />
will generate something like:
<input type="text" id="txtName" />
So your ID will not change and you don't have to use ClientID property to access the control in jQuery.

Feel free to contact me for any help related to jQuery, I will gladly help you.

Newest and Random jQuery Plugins -2013

$
0
0
Find a complied list of some of the newest, cool, useful, innovative and attractive jQuery plugins released recently. These plugins are worth to look as they offer new functionality with great design, innovation and new ideas.

Also take a look at my earlier post about latest plugin released in Sep 2013, July 2013, June 2013 and May 2013.

Offline.js


Offline.js is beautiful, theme base and small plugin which improve the experience of your app when your users lose connection. It monitors ajax requests looking for failure and also confirms the connection status by requesting an image or fake resource.


funnyText.js


Create funny and crazy moving texts in a simple way.


Bigfoot


Bigfoot is a jQuery plugin that creates exceptional footnotes. Simply include the code on your pages and footnotes will be detected automatically and improved.


TanColor


TanColor is a jQuery plugin that processes image using filter algorithm. It currently processes image into grayscale, bluescale, greenscale, redscale and more to come.


throwable


JQuery plugin to make html element throwable. It create physical-like html object in your browser.


Label Better


Label your form input like a boss with beautiful animation and without taking up space.


rainyday


The idea behind rainyday.js is to create a JavaScript library that makes use of the HTML5 canvas to render an animation of raindrops falling on a glass surface.


Feel free to contact me for any help related to jQuery, I will gladly help you.

10 jQuery Grids Plugins

$
0
0
Data Grid or Grid is the most preferable way to display data in list format. And there are plenty of jQuery Grid plugins available with lots of features. Earlier I had posted about jQuery Shopping Cart Plugins, jQuery Plugins to create Pinterest like layout, jQuery Rating Plugins and jQuery WebSite Tour Plugins. And in this post, find 10 Awesome jQuery Grid Plugins which can be easily integrated in your website. Enjoy..

SlickGrid


Quite simply, SlickGrid is a JavaScript grid/spreadsheet component. It is an advanced component and is going to be a bit more difficult to learn and configure, but once you realize its full potential, it will blow your mind!


jQGrid


jqGrid for ASP.NET is a server-side component built on top of the most popular jQuery plugin - jqGrid. It has features like blazing speed, minimum view state, minimum HTML and comes with themerollar support.


DataTables


DataTables is a plug-in for the jQuery Javascript library. It is a highly flexible tool, based upon the foundations of progressive enhancement, which will add advanced interaction controls to any HTML table. Some of its features are Variable length pagination, On-the-fly filtering, Multi-column sorting, Smart handling of column widths, Display data from almost any data source and many more...


FlexiGrid


FlexiGrid is lightweight but rich data grid with resizable columns and a scrolling data to match the headers, plus an ability to connect to an xml based data source using Ajax to load the content. Some of its features are Resizable columns, Resizable height and width, Sortable column headers, Cool theme, Can convert an ordinary table, Ability to connect to an ajax data source (XML and JSON), Paging and many more...


jTable


jTable is a jQuery plugin that is used to create AJAX based CRUD tables without coding HTML or Javascript. Some of its features are Automatically creates HTML table and loads records from server using AJAX, Supports server side paging using AJAX, Supports master/child tables, resize columns, show/hide columns, can be localized and many more...


ParamQuery Grid


ParamQuery grid is open source jQuery grid plugin for displaying and manipulating tabular data in rich Ajax applications. Inspired by MS Excel and Google spreadsheet, it leaves no stone unturned when it comes to performance.


jQWidget -> jqxGrid


The Grid is a powerful jQuery widget that displays tabular data. It offers rich support for interacting with data, including paging, grouping, sorting, filtering and editing.


jui DataGrid


jui_datagrid is an Ajax-enabled jQuery plugin, useful to manipulate database data in tabular format. Fully customizable, simple yet powerful API, jQuery themes compatible, localization support. It has a modular design, so it is using jui_pagination plugin for paging and jui_filter_rules plugin for searching.


Ingrid


Ingrid is an unobtrusive jQuery component that adds datagrid behaviors (column resizing, paging, sorting, row and column styling, and more) to your tables.


Open JS Grid


Open JS Grid comes with a mysql class so you don't have to do any database work yourself.


Feel free to contact me for any help related to jQuery, I will gladly help you.

Rotate words using jQuery

$
0
0
Words Rotator is a simple text elements rotator plugin. This plugin also allows to use CSS3 effects for word rotation. This plugins also allows to stop animation on mouse over, rotate words on click and also provide support for using icons and links for rotation.


Related Post:

Feel free to contact me for any help related to jQuery, I will gladly help you.
Viewing all 248 articles
Browse latest View live